So you’ve managed to reach Level 60, acquired an awesome Hellfire Ring, and socketed your shiny new Helm with a Radiant Star Ruby. Problem is…after 50 hours of farming, you’re still only Paragon Level 10 and wondering what you did wrong.
Maximizing your experience yields in Diablo III is not as easy as you might think. It’s not enough to know which zones have the highest monster density. You must also learn how to obtain five stacks of Nephalem Valor in the shortest period of time, and how to minimize travel time. Ideally, you’ll want to spend significantly more time slaying the demons of Sanctuary than backtracking or walking around aimlessly.
In this guide, we’ll take a look at a few proven faming routes, tell you why they work, and provide our own little spin on the most well-known routes. So, without further ado, let’s get started.
The Alkaizer Run
You’ve probably at least heard of this run. The Alkaizer Run, which derived its name from the first Barbarian to reach Paragon Level 100, is still one of the most lucrative and popular farming runs in Diablo III. It works as follows:
You’ll want to start by changing your quest to “Kill Azmodan.” Enter the game and take the waypoint to The Core of Arreat. Clear the level, stopping when you reach the Checkpoint. At this point, log out and start a new game.
Wait…why would you want to do that?! In order to optimize your efficiency, it is best to start at the end of the core and work backwards. But because your checkpoints reset when you choose a new quest, you must take a few minutes to set it to the most optimal checkpoint, which is located right before the Heart of Sin.
Clear The Core of Arreat from back to front, and take the waypoint to the Tower of the Damned Level 1. Run in a circle killing mobs until you are back to the waypoint. Feel free to travel left or right around the circle; it makes no difference. The reason why you want to farm these two smaller zones first is because they have a high concentration of Elites. Remember, we want to stack Nephalem Valor as quickly as possible.

Next, we’ll want to farm the high density zones. From the Tower of the Damned waypoint, port to Arreat Crater Level 2. Clear the zone, being mindful to stay on the main path.
Tip: As a general rule, the main path will travel North, then East or straight North. Try to memorize the different variations of the map so you can avoid backtracking.
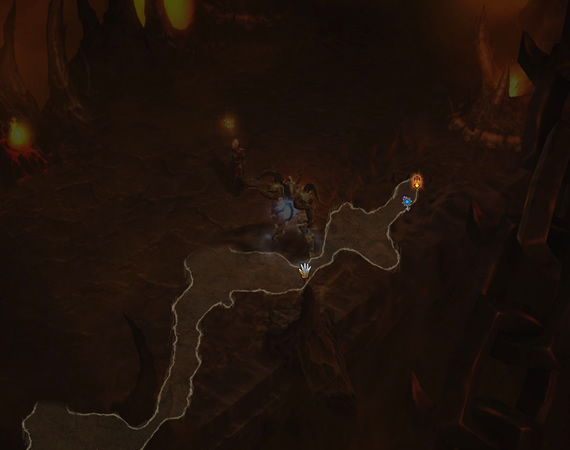
Alkaizer says to port back to town after clearing Arreat Crater Level 2, but I see it differently. Instead, travel down to the Tower of the Cursed Level 1, clear any lingering mobs, get the Shrine if there is one (about a 50% chance) and take the waypoint to The Bridge of Korsikk. You’ll once again travel in a big circle, killing monsters until you reach the original waypoint.
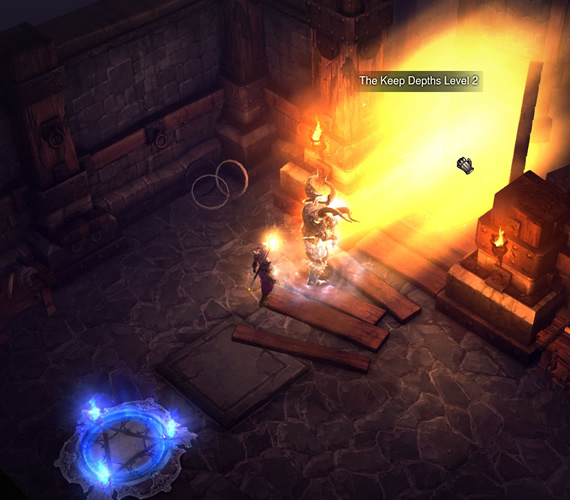
Take the waypoint to The Keep Depths Level 1, go down the stairs to Level 2 and clear the zone. This zone has a lot of twists and turns, so try to avoid clearing every last little cubby. If you find yourself having to backtrack to get to a populated part of the zone, you’re better off exiting the game and starting a fresh run. If you do manage to reach The Breach, either port to town and sell gear or exit the game. Congratulations, you’ve completed an Alkaizer Run.
Tip: If you really want to maximize your XP-per-hour, don’t pick up anything but Legendary items, rings and amulets. I know that will be difficult, but the more time you spend looting drops the more time you waste, not to mention all the time wasted identifying items and making trips to the vendor.
Time Required: 20 minutes for an average geared player and less than 15 for a high DPS character running on a low MP (Monster Power).
Variation on the Alkaizer Run
Instead of farming The Fields of Slaughter, you can travel directly to The Keep Depths Level 2 from the The Tower of the Cursed waypoint. From there, you can clear the Keeps, and either travel to Level 3 and take the waypoint to the Bridge, or port to town from The Breach and complete the Fields of Slaughter.

Tip: If you choose this variation, you can opt to port to Rakkis Crossing after you clear the Fields of Slaughter. However, I’d only recommend doing so if all your cooldowns are up and you are under the influence of one of the following shrines: Frenzied, Fleeting, Empowered or Enlightened.

Time Required: Same as for an Alkaizer Run. 2-3 minutes longer if you include Rakkis Crossing.
Quick Run
This run is designed for players who only want to spend a few minutes in each game. Start by taking the Bastion’s Keep waypoint directly to The Keep Depths Level 1. Proceed to level 2 and clear it. Port back to town and take the waypoint to Arreat Crater Level 2. Clear it and take the Tower of the Cursed waypoint to Rakkis Crossing. Travel towards The Fields of Slaughter, killing everything in your way. Once at the Fields, travel either left or right in a semi-circle. When you hit the waypoint, travel back to town. That’s it.
Even though this run doesn’t optimize Nephalem Valor, it is almost as effective as the Alkaizer Run in terms of raw experience per hour, mainly because you’re farming the four densest zones in the game.
Time Required: About 12 minutes for an average geared player, and 8 – 10 for someone well geared and optimized for farming.
What About Acts I and II?
Unfortunately, the monster density in these acts is nowhere near that found in Act III. There are individual maps within these acts that inhabit a large number of mobs – Vault of the Assassin comes to mind – but not enough to string together an efficient run. Blizzard does plan to address these acts in the future, so stay tuned for future updates.
The Legendary Run
Although this is not the most efficient way to gain XP, it is the best way to farm Legendary items. Start by porting to The Keep Depths Level 1 and take the stairs to level 2. Clear level 2. If you manage to acquire five stacks of Nephalem Armor from Elite mobs in this zone that means your game is what is known as a “high density game.” Proceed with a normal Alkaizer Run. If you only manage four or less stacks, exit and try again.

Tip: I call this run “The Legendary Run” because almost every time I’ve gained 5 stacks of NV from the Keep Depths Level 2 alone, I’ve had at least one Legendary item drop on the run.
Hopefully this guide has given you some ideas that will help to improve your Paragon leveling efficiency. 🙂
See Also: Paragon Leveling Tips: Notes on Gear, MP & Efficient Item Farming

Why not just use power leveling?