
New to Reaper of Souls, bounties are perhaps one of the most plentiful means of acquiring Paragon levels and Legendary loot. The premise is simple: complete one of 25 randomized objectives, and receive a reward. But not all bounties are created equal, with some proving far more lucrative than others.
In this guide, we’ll take an intimate look at the ins-and-outs of bounties, glossing over some basic strategies that will have you feeling like Boba Fett (before he was swallowed by the sarlacc) in no time.
Bounty Basics
Bounties are unlocked by beating Reaper’s primary antagonist Malthael. The good news is that once old Malthy is laid to waste, all of your characters will gain access to Adventure Mode, regardless of whether they’re a pimped out Champion of Sanctuary or a level 1 whipping boy.

Upon starting a new Adventure Mode game, players will have access to 25 new bounties – or five per act. Bounty objectives are semi-randomized. I say “semi” because there are a finite number of possible bounty objectives per zone, usually three.
The zones in which bounties occur are also semi-randomized, as there are always five bounties per Act and never more than one bounty per zone.
Completing a bounty rewards players with varying amounts of gold and experience, depending on the bounty type and difficulty setting. You’ll also receive Blood Shards and more often than not a Rift Keystone fragment.
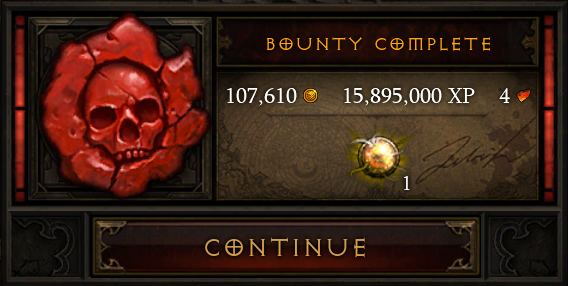
Blood Shards can be used to gamble on gear, and five Rift Keystone fragments can be harnessed to open a portal into another dimension, otherwise known as a Nephalem Rift.

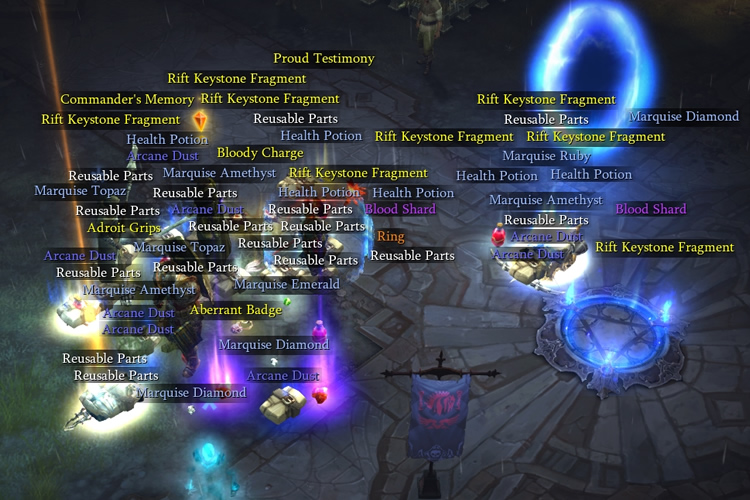
Should you be committed enough to complete all of an Act’s bounties, you will receive an additional gold / experience reward, as well as a Horadric Cache. The Cache typically contains an assortment of crafting materials, gems and Rift fragments in addition to a rare/legendary item or two.
In short, even if you’re not a stickler for optimal strategy, the benefits of completing bounties are certainly worth your while.
Dissecting bounty types
Let’s dig a bit deeper, shall we? There are four types of bounties, as follows:
- Short bounties: These almost always entail defeating a named Boss character. The Butcher would be a good example.
- Medium bounties: Cleansing cursed chests and shrines and completing in-game Events fall under this category.
- Large bounties: Requires you to kill X number of enemies and a purple named mob.
- Max bounties: Find a location, typically a side dungeon, travel to the second floor, and kill all mobs.
Experience rewards for completing bounties vary widely, as exhibited below:
- Short bounties reward 2.9 million experience on Torment I.
- Medium length bounties reward a bit more XP – 3.828 million on Torment I.
- Large bounties fare somewhat better, gifting 5.8 million XP on Torment I.
- And finally, max bounties reward players with a staggering 15.428 million experience points on Torment I.
Do note that experience rewards scale to difficulty. In other words, since Torment I awards a 300 percent experience boost, the experience rewards for completing a bounty are four times greater than they would be on Normal. Likewise, those brave enough to tackle a max bounty on Torment VI would receive 65.569 million experience – or 17 times Normal experience – for successful completion.
Gold drops also scale according to bounty type and difficulty setting.
Completing all of an Act’s bounties vs. completing the easiest bounties
Some bounties are notoriously easy, taking a minute or less to complete. Thus, an argument can be made that you should focus your efforts on completing the very easiest bounties as opposed to picking an Act and trudging through all five bounties.
While certainly a valid stance, it’s one that I’d argue against for the following reasons:
- The experience reward for completing an Act’s bounties is equivalent to finishing a large bounty: 5.8 million on Torment I. By picking and choosing which bounties you complete, you’re effectively giving away a healthy dose of experience.
- That wouldn’t be so bad if the most rewarding bounties (max bounties) weren’t that long. But with a few exceptions, most max bounties require you to navigate an area in search of a smaller area. Sure, sometimes you’ll find your objective quickly, but anyone who has navigated the Dahlgur Oasis and lived to tell the tale knows just how long it can take to find a specific location.
- If you care at all about navigating Nephalem Rifts and acquiring loot, you should know that you will not receive a Rift Keystone fragment or Blood Shards until you’ve completed an Act’s second bounty. From the second bounty onward you will receive 1, 2 or 4 shards (again, depending on difficulty setting and whether or not the Act is a bonus Act) and 1 Rift Keystone fragment.
- You won’t receive a Horadric Cache, which means you’ll have no chance of acquiring Legendary items with unique secondary stats.
To date, I’ve only found one bounty that is arguably worth farming for experience, and that’s Hell Rift 1.
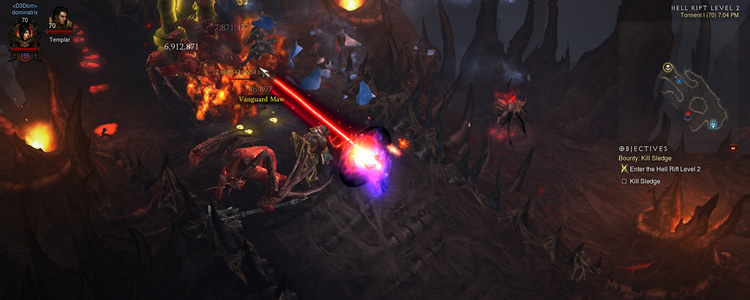
Found in Act IV, Hell Rift 1 tasks heroes with navigating a very short, predictable two level dungeon. Better yet, players are teleported directly to the dungeon – no frustrating navigation required.
Two of the possible three bounties will require you to kill a named mob, while the third asks that you clear the very small second level. Those who complete the latter will receive a max bounty bonus for cleaning house.
Oh, and before I forget, Hell Rift 1 frequently features a Cursed Chest event, serving to boost your already high experience gains even further.
So yes, farming Hell Rift 1 is probably just as rewarding, if not more so, than completing an Act’s five bounties. But you’ll still miss out on Rift Keystones, Blood Shards and a bunch of other worthwhile stuff.
In which Act should I farm bounties?
That depends. If you’re looking for a particular Legendary, you’re best off farming the Act(s) in which that item drops.
But under most circumstances your primary objective will be to reap the highest experience rewards in the shortest amount of time.
Alright, so what Act is the best for farming XP? The answer, my friend, may surprise you…
I’ve taken the liberty of running my fairly geared Wizard (900k+ buffed DPS, 5 mm toughness, 60% +Cold damage) through each Act’s bounties multiple times (at least five each) on Torment I. I did not equip a +XP gem in my helm nor did I brandish a Hellfire Ring or indulge in a Pool of Reflection.
I then compiled my findings into several revealing data averages, as listed below:
- Act I – Average experience per minute: 5.02 mm, 16.4 bounties per hour, average full clear takes 18.3 minutes.
- Act II – Average experience per minute: 4.85 mm, 15.8 bounties per hour, average full clear takes 19 minutes.
- Act III – Average experience per minute: 6.11 mm, 17.3 bounties per hour, average full clear takes 17.3 minutes.
- Act IV – Average experience per minute: 6.34 mm, 19.6 bounties per hour, average full clear takes 15.3 minutes.
- Act V – Average experience per minute: 5.57 mm, 12.8 bounties per hour, average full clear takes 23.5 minutes.
It was concluded that Act IV is the single best Act for farming bounties, followed by Act III, V, I and II.

Pre-RoS, Act IV was known as the Act no would ever dare farm, but for reasons listed below, it’s perfect for bounty farming:
- Predictability: There are only five main zones in Act IV, and thus bounties are effectively locked into the same areas.
- Map size: Act IV maps are smallish in nature – you won’t find any sprawling maps here. Along the same lines, the maps themselves are easy to navigate, and again, predictable.
- Hell Rift: See above discussion.
- Cursed bounties: You’ll likely come across at least one or two cursed bounties in your Act IV travels, both of which will task you with either killing 100 enemies or five waves of mobs. Densely packed enemies = high experience yields.
Act III gets our runner up spot, mainly because the maps tend to be on the smaller side – well, at least most of them. Act V takes third, not because the maps are small per se but because they feature more side events than zones in any other act. Expect Act V bounties to take a while, but to gift more experience per bounty than other acts.
Fourth place goes to Act I, which features too many larger maps and too many zones to farm effectively. And finally, as expected, our Diablo Razzie award goes to Act II. Nearly half of Act II’s many zones are gigantic and difficult to navigate. As you may have guessed, the more time spent running around, the less time spent completing bounties.
General bounty farming tips
- Short bounties: Rush your way to the boss, only killing mobs that get in your way. Save your strongest offensive powers (Archon, Wrath of the Berserker, etc.) for when you reach the boss.
- Medium bounties: Outside of pesky mobs that hang out around your objective, don’t bother killing enemies. Instead cover as much ground as possible. The good news is that chests, shrines and in-game events tend to be easy to find, more so once you’ve familiarized yourself with their locations.
- Large bounties: Contrary to popular belief, the last thing you’ll want to do is kill every mob in sight. Seek out the purple named mob first, only one-shotting the easiest mobs along the way. Once the purple has met his end, start killing mobs until the secondary objective is complete.
- Max bounties: You’ll want to navigate the main zone as quickly as possible. Since the mini-map finder has a rather large radar, the best way to do this is to hug the zone’s outskirts. Once you find the dungeon you’re looking for, rush through the first floor. Upon reaching the second floor, contain the urge to blow through every mob – you may miss one along the way. Instead, take a methodical, steady approach to slaughter.
- Regardless of the bounty type, try to skip Elite/Champion mobs.
- +25 percent movement speed is a must. If you don’t have the right gear, move some of your Core Paragon Points around. Skills that enhance your movement speed temporarily, like Sprint, are also very useful.
- Set the game’s difficulty to the highest level where you can still effectively blow through white mobs. Too low and you’ll miss out on valuable XP; too high and it’ll become difficult to rush through the zone. Find that happy medium – for most, it will reside somewhere between Master and Torment II.
Split bounties: A loot lover’s paradise
Maybe you’re not into experience. If loot is your thing, the best way to acquire it is through what’s commonly referred to as split bounty runs.
Here’s how they work:
- A group of four Heroes form a team, with the difficulty set to Normal.
- The group decides upon which Act they are going to farm.
- Each member of the group then picks one bounty to complete.
- The first player that completes his/her bounty starts the remaining fifth bounty. Other players may teleport to that player once they finish their own bounty.
- Each player receives credit for completing the Act’s bounties, and is rewarded with an experience bonus, and more importantly, a Horadric Cache.
- Rinse and repeat.
A solid team can finish an Act’s bounties in approximately five minutes. That’s 12 Horadric Caches an hour. I do suspect this farming mechanic will eventually get nerfed, but for now it’s the single most effective way to acquire loot in the game.
Conclusion
Thus concludes our discussion of bounties. Now that you’re an expert, I suspect I’ll see you on the battlefield kicking butt and taking (purple) names of your own. Good luck!

Not able to get up with blizzard maybe you can help cant get back to campaign mode also can’t open rifts can open trials. Thanks for any help my wizzard lvl 536.